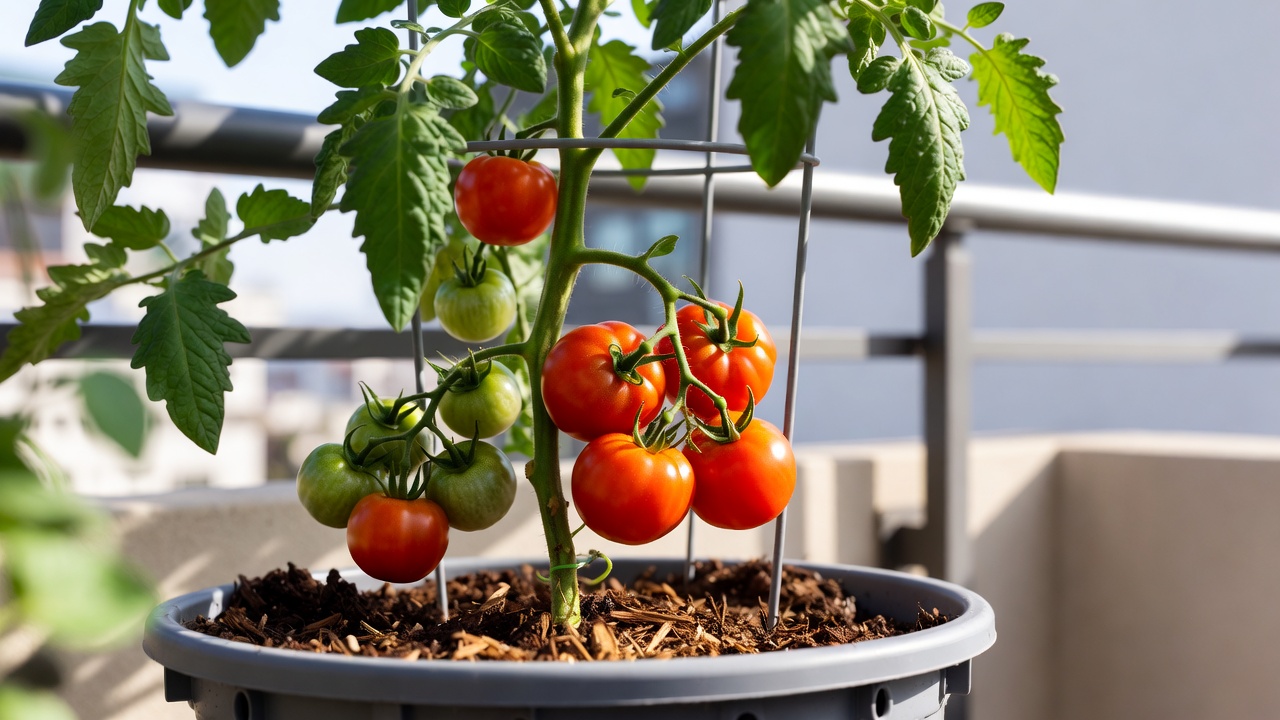
Growing tomatoes in pots is one of the most rewarding forms of container gardening. Whether you have a balcony, rooftop, patio, or small backyard, you can produce high yields with the right setup.
This complete guide explains how to grow tomatoes in containers successfully, covering container size, soil mix, watering schedule, fertilizing strategy, pruning, pest control, and harvesting.
This guide answers all beginner and intermediate search intent clearly and practically.
Why Grow Tomatoes in Containers?
Tomatoes adapt exceptionally well to containers because:
-
They thrive in warm soil
-
Roots perform well in controlled environments
-
Containers allow mobility
-
Soil quality can be optimized
-
Drainage is easier to manage
Container gardening also reduces weed competition and soil-borne diseases.
Step 1: Choose the Right Tomato Variety
Not all tomatoes perform equally well in containers.
Determinate vs Indeterminate
Determinate (Bush Varieties)
-
Grow to a fixed height
-
Produce fruit all at once
-
Easier for beginners
-
Ideal for small spaces
Indeterminate (Vining Varieties)
-
Continue growing and producing
-
Require staking or cages
-
Higher yield potential
-
Need larger containers
Best Types for Containers
-
Cherry tomatoes
-
Patio tomatoes
-
Dwarf varieties
-
Bush Roma types
Choose varieties labeled:
-
“Patio”
-
“Compact”
-
“Dwarf”
-
“Container-friendly”
Step 2: Select the Proper Container Size
Container size directly affects yield.
Minimum Size Guidelines
-
Determinate tomatoes: 5-gallon container
-
Indeterminate tomatoes: 10–15 gallons
-
Depth: At least 12–18 inches
Small pots lead to:
-
Root restriction
-
Faster drying
-
Nutrient depletion
-
Reduced fruit production
Bigger containers produce stronger plants.
Step 3: Ensure Proper Drainage
Tomatoes dislike soggy roots.
Requirements:
-
At least 3–4 drainage holes
-
Elevated pot base
-
Free-flowing bottom drainage
Never use sealed decorative pots without holes unless using a nursery pot insert.
Poor drainage causes:
-
Root rot
-
Yellow leaves
-
Fungal disease
-
Blossom drop
Step 4: Use the Best Soil Mix
Garden soil is not suitable for containers.
Ideal Potting Mix Composition:
-
40% peat moss or coco coir
-
30% compost
-
20% perlite or vermiculite
-
10% worm castings (optional)
Why This Works:
-
Lightweight and airy
-
Retains moisture
-
Drains excess water
-
Provides nutrients
Avoid heavy clay-based soil.
Step 5: Plant Deep for Strong Roots
Tomatoes develop roots along buried stems.
Correct Planting Technique:
-
Remove lower leaves
-
Bury 2/3 of the stem
-
Firm soil gently
-
Water deeply after planting
Deep planting strengthens the root system and stabilizes growth.
Step 6: Provide 6–8 Hours of Full Sun
Tomatoes require full sunlight.
Ideal Conditions:
-
6–8 hours direct sunlight daily
-
South-facing balcony preferred
-
Avoid deep shade
Insufficient sunlight causes:
-
Leggy growth
-
Few flowers
-
Small fruit
-
Delayed ripening
If sunlight is limited, choose cherry varieties.
Step 7: Master the Watering Schedule
Container tomatoes dry faster than ground plants.
Watering Rules:
-
Check soil daily
-
Water when top 1–2 inches are dry
-
Water deeply until drainage occurs
-
Avoid wetting leaves
Signs of Overwatering:
-
Yellow leaves
-
Soft stems
-
Fungus gnats
Signs of Underwatering:
-
Wilting
-
Blossom end rot
-
Cracked fruit
Consistency prevents stress.
Step 8: Fertilize Strategically
Tomatoes are heavy feeders.
Fertilizing Plan:
At Planting:
-
Mix slow-release fertilizer into soil
During Growth:
-
Liquid fertilizer every 2–3 weeks
-
Balanced formula (10-10-10)
At Flowering:
-
Switch to higher potassium formula
Nutrient deficiency leads to:
-
Pale leaves
-
Poor flowering
-
Low fruit production
Containers lose nutrients faster than garden beds.
Step 9: Support the Plant Early
Install support at planting time.
Options:
-
Tomato cages
-
Wooden stakes
-
Trellis systems
Waiting too long may damage roots.
Support:
-
Improves airflow
-
Reduces disease
-
Prevents stem breakage
-
Keeps fruit clean
Step 10: Prune for Productivity
Pruning improves airflow and directs energy to fruit.
Remove:
-
Suckers (side shoots between main stem and branches)
-
Yellow lower leaves
-
Diseased foliage
Do not over-prune determinate varieties.
Pruning:
-
Increases fruit size
-
Reduces fungal risk
-
Improves sunlight exposure
Step 11: Prevent Common Problems
1. Blossom End Rot
Cause:
-
Calcium imbalance
-
Inconsistent watering
Fix:
-
Maintain steady moisture
-
Add calcium supplement if needed
2. Yellow Leaves
Cause:
-
Overwatering
-
Nitrogen deficiency
Fix:
-
Adjust watering
-
Apply balanced fertilizer
3. Leaf Curl
Cause:
-
Heat stress
-
Wind exposure
Fix:
-
Provide afternoon shade in extreme heat
4. Pests
Common container pests:
-
Aphids
-
Whiteflies
-
Spider mites
Control:
-
Neem oil spray
-
Hand removal
-
Improve airflow
Early detection is key.
Step 12: Temperature Management
Tomatoes prefer:
-
Day: 21–29°C (70–85°F)
-
Night: Above 13°C (55°F)
Protect From:
-
Heatwaves
-
Cold nights
-
Strong winds
Containers heat up faster than ground soil.
In hot climates:
-
Use light-colored pots
-
Mulch soil surface
-
Water in early morning
Step 13: Mulch the Surface
Mulching prevents:
-
Moisture loss
-
Temperature swings
-
Soil splashing
Use:
-
Straw
-
Shredded bark
-
Compost layer
Mulch improves consistency.
Step 14: Pollination Support
Container tomatoes sometimes struggle with pollination.
Help by:
-
Gently shaking plants
-
Tapping flower clusters
-
Encouraging airflow
Tomatoes are self-pollinating but benefit from movement.
Step 15: Harvest at the Right Time
Harvest when:
-
Fruit is fully colored
-
Slightly firm but not hard
-
Easily twists off vine
Frequent harvesting encourages more production.
Do not leave overripe fruit on plant.
Container Tomato Growing Checklist
Before planting:
✔ 10+ gallon container
✔ Drainage holes
✔ Quality potting mix
✔ Full sun location
✔ Support structure ready
✔ Fertilizer plan
✔ Consistent watering schedule
Frequently Asked Questions
How many tomato plants per container?
One plant per 5–15 gallon container.
Can tomatoes grow in small pots?
Yes, but yield will be limited. Minimum 5 gallons recommended.
How often should I water container tomatoes?
Usually daily in hot weather. Check soil first.
What is the best fertilizer for potted tomatoes?
Balanced fertilizer during growth, higher potassium during flowering.
Can I reuse potting soil next season?
Yes, if refreshed with compost and organic fertilizer.
Common Mistakes to Avoid
-
Using small containers
-
Skipping fertilizer
-
Overwatering
-
Ignoring drainage
-
Planting in shade
-
Failing to support plants
-
Inconsistent watering
Avoiding these mistakes dramatically increases yield.
Final Thoughts
Learning how to grow tomatoes in containers successfully comes down to five essentials:
-
Large container
-
Proper drainage
-
High-quality potting mix
-
Full sun
-
Consistent watering and feeding
When managed correctly, container tomatoes can produce abundant harvests equal to in-ground gardens.
With careful setup and maintenance, even a small balcony can supply fresh tomatoes all season long.
Start with strong seedlings, give roots space, maintain consistent care, and your container tomatoes will reward you with healthy growth and high yields.